


Over the years, I’ve moved thousands of pieces of furniture—everything from antique dressers in older homes in Arnprior, to oversized sectionals in modern homes in Kemptville, to heirloom dining sets coming out of century-old homes in Carleton Place. And while every move is different, one thing remains the same: furniture needs to be protected with intention, technique, and patience.
When families trust me with their belongings, I take that responsibility seriously. A move isn’t just about transporting items from one home to another—it’s about preserving the condition, stability, and sentimental value of the furniture people spent years taking care of.
That’s why I developed a detailed, step-by-step method that I follow for every move, whether I’m working with large, heavy pieces or fragile, one-of-a-kind items. This approach ensures that every piece of furniture arrives safely, securely, and without a single scratch.
Today, I’m sharing the exact method I use for moves throughout Kemptville, Arnprior, and Carleton Place, so you can understand the level of care that goes into every job.
Step 1: Conducting a Full Furniture Assessment Before Moving Day
Before I ever pick up a dolly, blanket, or roll of tape, I begin every move with a full furniture assessment. This is where I get a clear understanding of what I’m working with and how to approach each item.
During this assessment, I look at:
- Furniture type and construction
- Weight and dimensions
- Fragile components
- Detachable parts
- Existing wear or weak points
- Special materials (glass, marble, leather, hardwood)
- Homes with tight staircases or narrow halls
In older towns like Arnprior and Carleton Place, I often see furniture inside older homes with tricky layouts, steep staircases, or historic features. That means I need creative movement strategies to protect both the furniture and the home.
Kemptville, on the other hand, often has larger homes with modern layouts—but the furniture tends to be bigger, heavier, and more complex.
Knowing the layout and the furniture ahead of time helps me create the safest possible plan.
Step 2: Preparing the Home for Safe Furniture Handling
Protecting furniture starts with protecting the space around it. Before any lifting begins, I prepare the pathways, floors, walls, and entry points.
Here’s what I set up:
- Floor runners to prevent scratches, slipping, or moisture damage
- Corner guards to protect walls during tight turns
- Door frame protectors to avoid denting trim
- Padding on banisters or staircase edges
- Clear, clutter-free pathways from each room to the truck
- Secure door wedges so doors don’t swing into furniture
In Carleton Place especially, older flooring can be prone to scratches or dents. In Kemptville, wide entryways are helpful, but staircases can still cause challenges. In Arnprior, century homes often require extra padding because of narrow door frames.
Every home has its own obstacles—but proper preparation eliminates most of the risk.
Step 3: Disassembling Furniture the Right Way
One of the biggest mistakes people make during a move is trying to move furniture intact when it should be disassembled. Disassembling doesn’t just make the item lighter—it protects the structure.
Here’s what I typically disassemble:
- Beds and bedframes
- Dining tables
- Sectionals and modular sofas
- Entertainment units
- Shelving systems
- Desks
- Dressers with detachable mirrors
- Wardrobes
- Appliances (when applicable)
My method for disassembling furniture is always careful and intentional:
- Remove small parts first (knobs, bolts, legs, shelves).
- Use labeled bags for all screws and hardware.
- Tape the hardware bags directly to the corresponding furniture pieces so nothing is lost.
- Wrap detached surfaces individually to avoid friction damage.
- Stack items so they remain stable during transit.
Families in Kemptville often have large, newer furniture sets. Families in Arnprior and Carleton Place often have antique furniture that requires extra attention. Disassembly allows me to protect both types equally.
Step 4: Wrapping Each Piece With High-Quality Protection
Once furniture is disassembled and ready, I wrap it using a combination of materials designed to prevent scratches, dents, and surface damage.
I use:
Thick moving blankets
The foundation of safe wrapping. These blankets protect from bumps, scrapes, and movement inside the truck.
Shrink wrap
Used around blankets to secure them tightly and keep moisture away—especially important during winter moves in Ottawa Valley areas.
Bubble wrap for delicate surfaces
Glass, china cabinets, mirrors, and fragile woodwork require extra cushioning.
Foam sheets for high-polish or antique finishes
For protecting varnished surfaces or antique pieces that shouldn’t have direct contact with padding.
The goal is to create a barrier around each furniture piece that protects it from friction, pressure, vibration, or shifting.
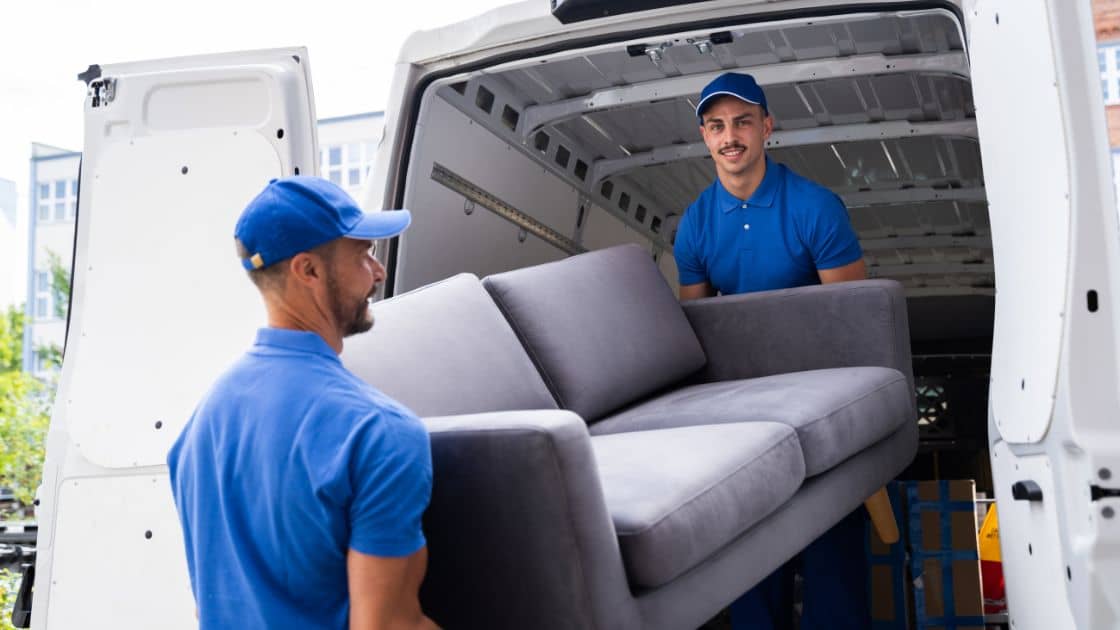
Step 5: Choosing the Right Lifting and Moving Techniques
Proper handling is what prevents damage during the actual movement of furniture. Over the years, I’ve learned that brute force never wins—strategy and technique always do.
I always use:
- Furniture dollies
- Shoulder straps
- Lifting harnesses
- Sliders
- Two-wheel dollies for steep entrances
- Extra handlers for oversized pieces
I never:
- Drag furniture
- Tilt heavy pieces incorrectly
- Twist or force an item through a tight entry
Instead, I assess angles, communicate clearly, and make slow, calculated movements—especially in older homes in Arnprior and Carleton Place where staircases were never designed for modern furniture.
Step 6: Navigating Tight Spaces With Precision
Every town presents its own challenges:
Kemptville
Large, modern homes with unexpected obstacles—like tight basement stairs or narrow bonus rooms.
Arnprior
Older homes with narrow hallways, tight corner turns, or second floors only accessible by steep steps.
Carleton Place
A mix of historic homes and newer builds, each requiring different strategies for maneuvering furniture.
My process for tight spaces includes:
- Measuring both the furniture and the space
- Planning angles before lifting
- Removing doors if needed
- Using sliders for floors that can’t be scratched
- Tilting certain items in “L-shaped” positions
- Moving slowly and communicating constantly
This careful process is the reason furniture stays scratch-free—even in the toughest layouts.
Step 7: Loading the Truck With Purpose, Not Guesswork
Packing furniture into a moving truck is a strategic puzzle. If the pieces aren’t placed properly, everything becomes vulnerable.
My truck-loading method includes:
1. Heavy items first
Placed against the wall closest to the cab for stability.
2. Balanced weight distribution
Prevents furniture from shifting during the drive into or out of Ottawa Valley.
3. Vertical stacking with protection
Some items are safer upright, and I use blankets between them to avoid rubbing.
4. Straps and tie-downs
Every large piece is secured firmly so it cannot slide or tilt.
5. Fragile items loaded last
This reduces their time in the cold during winter moves and keeps them easy to access.
6. No gaps between items
Gaps lead to movement, and movement leads to damage—so I fill them with boxes or padding when necessary.
Whether driving from Kemptville to Ottawa, Arnprior to Kanata, or Carleton Place to Stittsville, this method is what ensures every piece arrives exactly as it was packed.
Step 8: Protecting Furniture During Transit
Some people assume the danger ends once the truck doors close—but the road can be just as challenging as the home.
Highways around Kemptville, Arnprior, and Carleton Place can vary:
- Rural roads with gravel or potholes
- Winter ice near the Rideau corridor
- Sharp turns on county roads
- Temperature shifts affecting wood and fabrics
- Construction zones
During transit, I ensure:
- Speed is controlled
- Sudden stops are avoided
- Furniture is checked if the drive is long
- Fragile pieces remain insulated
Years of experience have taught me how to drive safely with a full load—reducing vibration and movement inside the truck.
Step 9: Unloading With the Same Care as Loading
Unloading is not a rushed process—I treat it with the same attention as packing and loading.
My unloading steps include:
- Removing protective material only when furniture is inside
- Carrying items slowly and steadily
- Using the safest entry point into the new home
- Keeping pathways clear
- Setting furniture directly in the correct room
- Reassembling pieces immediately for stability
Many clients are relieved when they see their furniture reassembled, polished, and placed exactly where they want it. It’s the final touch that makes a new home feel ready.
Step 10: Making Sure Everything Is Perfect Before I Leave
Before completing a move, I take time to walk through the new home with the family to ensure:
- Every item arrived safely
- Nothing is scratched or dented
- Furniture is placed correctly
- Beds are assembled and stable
- Heavy items won’t need to be moved again
- Fragile pieces are secure
- Boxes are placed where they belong
This final walkthrough gives families peace of mind—and gives me satisfaction knowing the job was done with precision.
Final Thoughts
Keeping furniture safe during a move is not about rushing or improvising—it’s about structure, experience, and respect for the home and the people who live in it.
Whether I’m helping a family move from Kemptville into their first home, relocating longtime homeowners in Arnprior, or assisting a growing family in Carleton Place, my method never changes. Every piece of furniture receives the same attention, from an everyday dresser to a cherished family heirloom.
The goal is simple:
Deliver every item in perfect condition, protect every home I work in, and give every family the peace of mind they deserve during their move.
That’s what keeps me committed to this process—and it’s why I’m proud of the care I bring to every move.